Posts

Counting dice and train wagons using computer vision

Image
Computer vision exercises with preprocessing Before starting my next project, I decided to work on some computer vision exercises. Each example is based on straightforward image preprocessing techniques. No complex data structures or machine learning are involved. Dice Detection I got this idea while browsing the net and became curious about how challenging it would be to write such a script. Here’s a step-by-step breakdown of the algorithm: Movement Detection : By comparing several frames with thresholds, we can determine if there is any movement in the frame. Adding a small time buffer after the movement stops gives us more accurate information. Removing the Background : Thresholding the grayscale frame helps to remove the background, leaving us with a binary image that highlights the objects. Cropping the Objects : Using contours, we can detect and isolate the objects by cropping them. Detecting Dots : By inverting the image, the dots on the dice become more distinguish...

Play table

Image
Using proximity sensors for playing midi tones combined with LED visualization Description The goal of this project was to create a table-sized device equipped with multiple proximity sensors capable of playing MIDI tones. Each sensor is accompanied by LEDs that indicate the distance of the user's hand above the table. This interactive table can be used by one or more people simultaneously. Hardware Setup I began with a cardboard prototype to test the sensors and the underlying logic. Afterward, I ordered a custom plottered sticker with a design which was painted with bare conductive paint. I drilled holes and connected the touchboard to seven Arduino Nanos, each controlling 13 LEDs. Additionally, I incorporated two potentiometers: one for volume control and another for changing the note setup. Programming The programming task was divided into two parts: Master Program (Touchboard): Reads values from the proximity sensors and sends messages to the slave Arduinos. Sl...

Creating Fake SMS with Android

Image
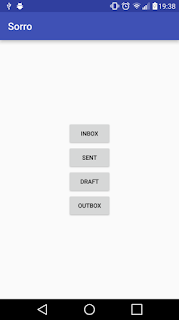
I was curious about how challenging it would be to create fake SMS messages, so I decided to make a small research. I came across a straightforward app that allows users to create fake SMS messages. The app's interface is user-friendly, letting you set the message type, date, and time. However, to use this app, you need to set it as the default messaging application. At this point, I was confident that it was possible to achieve this without root permissions. Initial Exploration My first approach was to send a fake intent to simulate a new SMS arrival. Despite my efforts, this method didn’t work. Many sources suggested using the android.provider.Telephony.SMS_DELIVER intent action, which is the system intent action for broadcasting SMS. However, starting from Android 4.4 (KitKat), only the default messaging app can receive this intent, and broadcasting it is restricted to system applications. Additionally, permissions for reading and writing SMS are restricted to the default messa...

Self playable game on smartphone

Image
Hardware I recently assembled a Lego phone holder that rotates along the Y-axis (the longer side of the phone). The holder's end is attached to a servo motor, which is connected to an Android smartphone via USB OTG through a motor module. This motor module can control up to 24 servo motors and operates at 5 volts. Software The motor module has its own built-in protocol, which handles rotation and speed, with parameters separated by newline characters. The second part of the project involved developing an Android application to communicate with the servo module using this serial protocol. I based the application on an example of USB serial communication with Arduino, adapting it to work with my device. Game For this project, I chose a game I developed about a year ago. It's a simple game where the accelerometer controls a rocket that must navigate through gates. Tilting the device left or right adjusts the rocket's position, and the goal is to pass through as many gates as p...

Wall Clock Made with AVR MCU and LED Display

Image
Idea The goal of this project was to explore using a numeric LED display with a microcontroller (MCU). To make it more engaging, I decided to create a wall clock that displays time both digitally and analogically. I chose the Atmega16L MCU for its 26 I/O pins—12 for the numeric display, 12 for the 2mm LEDs, and 2 for the buttons. The clock features two buttons: one to add hours and another to add minutes. The 2mm LEDs around the edge represent seconds, while the numeric display in the center shows hours and minutes. Display I sourced my display from eBay without a datasheet, but the pin configuration is typically similar across different displays. The four 7-segment digits are controlled by 12 I/O pins—each digit consists of 8 segments (7 for numbers and 1 for the dot). The remaining four pins are used as grounds for each digit. To illuminate all four digits, the MCU must rapidly switch between them. Timers Timers are fundamental counters in microcontrollers. The ATmega16 features two ...

Using a Proximity Sensor for Scrolling Documents

Image
What For Christmas, I treated myself to a Touchboard from Bare Conductive. This board features an Atmel ATMega32U4 microprocessor, 12 analog inputs, and 20 digital pins. Being part of the Arduino family, it’s compatible with the Arduino IDE, which makes it a versatile tool for various projects. The Touchboard comes with a unique conductive paint called "bare paint," which, when used with the analog inputs, allows you to create touch or proximity sensors. First Impressions When I first experimented with the proximity sensor, using it to adjust volume felt almost magical! I was impressed by the precision of the proximity detection. The SDK provides around 10 examples to get started, and the libraries are straightforward, allowing you to accomplish a lot with just a few lines of code. The board supports both MP3 and MIDI sound effects. MP3 files can be updated on a microSD card, while the MIDI mode offers over 100 musical instruments. Switching between MP3 and MIDI requires conn...

Programming the Atmel ATmega8L Microcontroller

Image
Introduction   In this article, I'll dive into hardware programming by working with a microcontroller (MCU). Having no prior experience with MCUs, this post will walk you through my learning process and project development. Getting Started   Based on a colleague's recommendation, I decided to use a USB-AVR programmer compatible with Atmel AVR microcontrollers. I ordered the USB-AVR programmer, an ATmega8L microcontroller, some resistors, LEDs, and a breadboard. For development, I prefer using IDEs due to their features like syntax highlighting and integrated build tools, which save time and resources. I chose Eclipse for this project. Setting up Eclipse for AVR programming involves installing the following libraries: gcc-avr : Compiler for Atmel AVR microcontrollers. binutils-avr : Cross-compiling version of GNU binutils. gdb-avr : GDB for debugging AVR binaries. avr-libc : C library for GCC on Atmel AVR microcontrollers. avrdude : Tool for transferring hex files onto the micr...