Drone Following Instructions
Reading Instructions from QR Codes and Executing Them Using an Android Application
Introduction
Recently, I had the opportunity to build a drone prototype controlled by an Android device. The requirements were clear: the drone needed to be small in size and come with an SDK that supported video streaming. After some research, I decided that the Bebop 2 from Parrot was the best choice. Parrot is one of the few companies that offers an open SDK for developers, and they recently released the third version of their SDK.To get started, I worked with the Android application example provided by Parrot. This example covers almost every basic feature: connecting to the drone, moving it around, capturing high-quality photos, and accessing the drone’s media.
One of the tasks for this prototype was to enable autonomous landing on a pattern. After researching existing solutions, I found a paper that explained the theory behind autonomous landing. This inspired me to create an Android application that could navigate the drone to land on a detected pattern—in this case, a QR code. Later, I enhanced the application to read instructions from detected patterns and execute them sequentially.
Drone Details
The Bebop 2 comes with several impressive features, but I’ll focus on those most relevant to development. Notably, it has a flight time of about 22 minutes, which is quite useful. However, I found a minor drawback: the ultrasonic sensor for altitude detection is not yet accessible via the API. On the plus side, the camera has some great features. The drone has a front-facing camera with a fisheye lens, and the camera uses a gyroscope to keep the streaming video stable, even when the drone is tilting. You can also adjust the camera angle via the API to get video from different perspectives. For this prototype, I needed both the frontal and bottom views. The streaming video quality can be set up to 640x368 pixels, while the recording quality is higher but not accessible as a stream. The video resolution can also be adjusted via the API.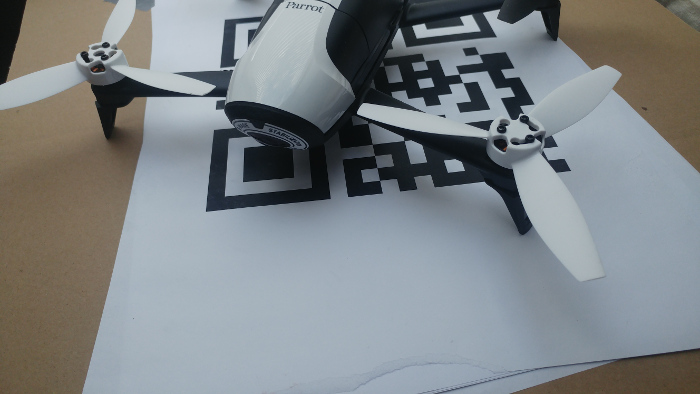 |
| Bebop 2 on a cardboard landing pad |
Detection and Output
Initially, I encountered a small issue when trying to get a raw image from the video stream. Once I resolved that, I used Google Vision Library for asynchronous QR code detection. One disadvantage of this library is that it does not provide the rotation of the QR code, so I had to implement this feature myself. I also needed a way to visualize the output, so I added a transparent layer above the video stream for drawing.
Sequence of Moves
While researching existing solutions, I found a few libraries written in Python and JavaScript that can execute movements sequentially. These movements are executed as a sorted list of commands in a predefined order. I implemented my own sequence of moves consisting of three different types of commands:- Time Move: Executes a move for a specified duration (e.g., move forward for 3000 milliseconds).
- Single Action: Executes a single action (e.g., take off, land, take a picture).
- Condition: Executes an action after a condition is met (e.g., after locking onto the pattern, read the instructions and add them to the command stack).
Landing
Landing is a type of condition rule command. The condition part involves centering the drone above the pattern, while the action part is the landing itself. To achieve accurate centering, I used seven simple, independent controllers. Five of these controllers manage movement, and two handle potential corrections. Each controller receives the position of the QR code from the asynchronous video stream detector, along with a timestamp.The movement controllers are straightforward, managing movement along a single axis in both directions. The rotation controller aligns the drone to the pattern’s orientation so that the next instruction is executed with the correct rotation. This controller becomes active only when the other four movement controllers have properly centered the drone.
There are also two correction controllers. The small correction controller uses the last detected position of the QR code to make minor adjustments (e.g., if the last position was detected at the bottom, move the drone backward slightly). The large correction controller is triggered when the pattern hasn’t been detected for a while (1-3 seconds) and initiates a search procedure involving several steps (e.g., move up, rotate). Both correction controllers have time limits.
Movement Controllers
- Forward / Backward
- Left / Right
- Rotate Clockwise / Rotate Counterclockwise
- Up / Down
Pattern Rotation
- Correction Controllers
- Small Correction (using the last known pattern position)
- Large Correction (when the pattern is lost, initiate a search)
Executing Instructions
Executing instructions follows the same condition rule command format as the landing action. The condition part involves centering the drone above the pattern, while the action is to parse the QR code message and add a new command to the command stack. Each message has a simple structure (e.g.,"id:5;fw:2000" means "go forward for 2000 milliseconds") and a unique identifier that must be larger than the previous one.Testing
For testing, I created a few cardboard landing pads. The pads needed to be heavy enough so that the wind from the drone wouldn’t blow them away.I tested the instruction process both indoors and outdoors. Outdoor results were less satisfactory— even light side winds pushed the drone away from the QR code, requiring multiple search procedures to read the instructions successfully.
In contrast, the indoor tests were quite successful. The QR code was detected almost every time, and the search procedure wasn’t triggered at all. I recorded the indoor tests, and the video is attached.


hi is it ok to share the code please ???
ReplyDelete